Winterizing your RV trailer is an essential task for RV owners in colder climates. Neglecting this process can lead to costly damage and repairs. In this comprehensive guide, we will take you through the step-by-step process of winterizing your RV trailer to ensure it remains in top condition during the winter months. We’ll cover everything from preparing your RV for winter storage to protecting its plumbing system and appliances.
Let’s get started!
Why Winterize Your RV Trailer?
Winterizing your RV trailer is crucial because freezing temperatures can cause significant damage. Water freezing in the plumbing lines can lead to burst pipes, while ice expansion can harm appliances, faucets, and the water heater. By properly winterizing your RV, you can prevent these issues and ensure your vehicle remains in excellent condition.
When to Start Winterizing
The timing of winterization depends on your location and climate. It’s generally recommended to start the process when the average nightly temperature drops to around 32°F (0°C) or lower. However, it’s essential to keep an eye on the weather forecast and not delay the process, as unexpected cold snaps can occur.
Step-by-Step Process to Winterizing Your RV Trailer
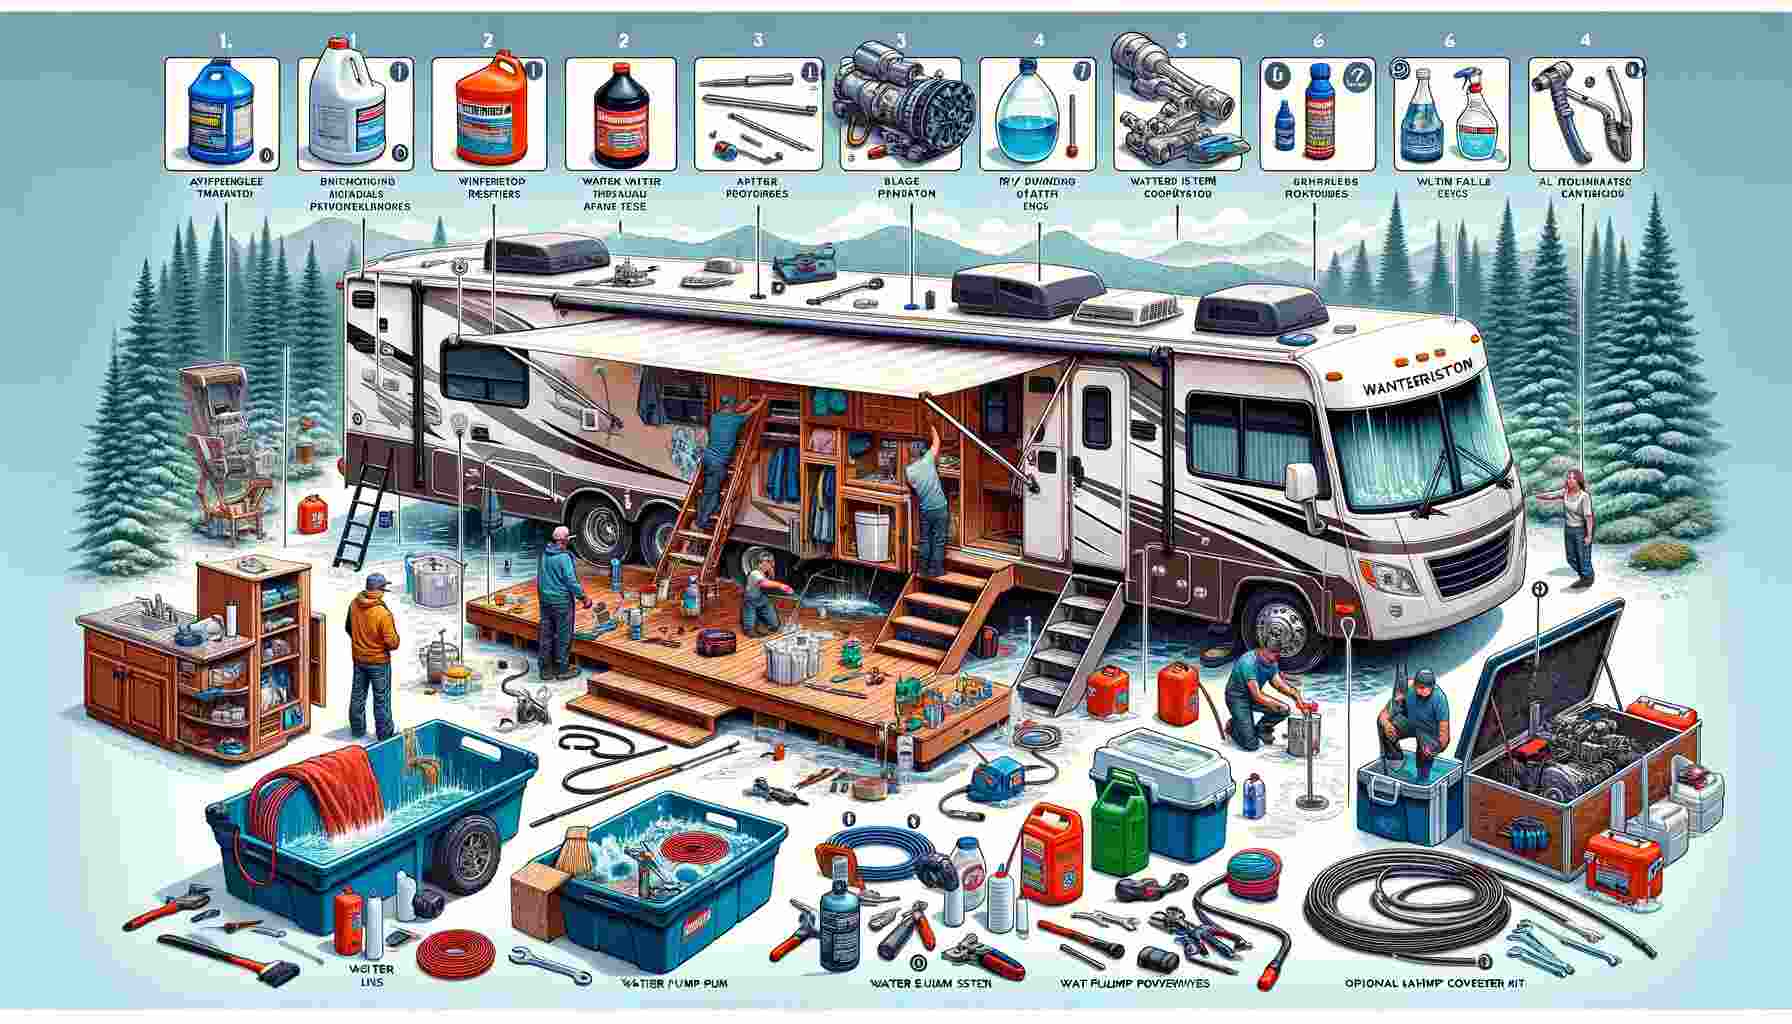
1. Gathering the Necessary Supplies
Before you begin the winterization process, you’ll need to gather the right supplies and equipment.
Antifreeze
RV antifreeze is a non-toxic, propylene glycol-based fluid specifically designed for winterizing RVs. You’ll need several gallons of this antifreeze for the process.
Tools and Equipment
- Screwdrivers
- Pliers
- Wrenches
- Socket set
- Air compressor (optional)
- Water pump converter kit (for easy antifreeze injection)
- Bucket
Cleaning Supplies
Cleaning your RV thoroughly before winterizing it helps prevent mold and mildew growth during storage. You’ll need:
- RV-specific cleaning products
- Broom and mop
- Cleaning rags and sponges
- Vacuum cleaner
2. Exterior Preparations
Cleaning and Washing
Start by giving your RV trailer a thorough cleaning. Remove any dirt, grime, or residue from the exterior. Pay special attention to the roof and awnings to prevent mold growth.
Inspecting Seals and Caulking
Check all seals and caulking around windows, doors, vents, and seams. Repair or replace any damaged seals to prevent water infiltration.
Covering Your RV
Consider investing in an RV cover to protect your trailer from the elements during storage. A cover can help prevent sun damage, keep debris away, and deter pests from making your RV their home.
3. Interior Preparations
Cleaning and Decluttering
Clean the interior of your RV thoroughly. Remove all perishable items, including food, toiletries, and cleaning supplies. This will prevent unwanted odors and pests.
Draining Water Tanks
Before you can winterize the plumbing system, empty all your RV’s water tanks. This includes the fresh water tank, gray water tank, and black water tank.
Protecting Appliances and Electronics
To prevent damage to appliances and electronics, either remove them from the RV or follow the manufacturer’s instructions for winter storage. This includes items like TVs, refrigerators, and microwave ovens.
4. Protecting the Plumbing System
One of the most critical aspects of winterizing an RV is protecting the plumbing system. Here’s how to do it step-by-step.
Draining the Water Lines
- Turn off the water supply to your RV.
- Open all faucets, including hot and cold taps, both inside and outside.
- Flush the toilet to drain the water from the plumbing lines.
- Don’t forget to drain any water filters or softeners if you have them.
Using RV Antifreeze
RV antifreeze is essential for preventing frozen pipes. Follow these steps to use it properly:
- Close all drain valves and faucets.
- Connect a water pump converter kit to your RV’s water pump.
- Place the end of the kit’s tube into a container of RV antifreeze.
- Turn on the water pump. It will draw antifreeze into the plumbing system.
- Go through each faucet (hot and cold) until you see pink antifreeze come out. Repeat for the toilet, shower, and outdoor shower if applicable.
- Pour antifreeze down each drain to protect the P-traps.
Winterizing the Water Heater
Don’t forget to winterize your water heater:
- Turn off the water heater and let it cool down.
- Locate the water heater bypass valve and set it to “bypass” mode.
- Drain the water from the water heater using the drain plug.
- Close the drain plug and add antifreeze to the water heater through the anode rod hole.
5. Storing Your RV Trailer
Proper storage is crucial to keep your RV in good condition during the winter months.
Finding the Right Storage Location
Look for a secure, covered storage facility or a well-ventilated, dry area on your property. Elevate the RV slightly if possible to prevent moisture buildup.
Storing with Jacks or Stabilizers
If you have hydraulic jacks or stabilizers, use them to take the weight off your tires. This prevents flat spots and uneven tire wear during storage.
Tire Maintenance
Inflate your RV’s tires to the recommended pressure and cover them to protect against UV damage. Periodically check the tire pressure throughout the winter.
Additional Tips and Considerations
Pest Control
To keep pests away from your RV, use pest repellents or traps inside. You can also seal any potential entry points, such as gaps around pipes and wiring.
Battery Maintenance
If you’re not using a battery maintainer, remove the RV’s batteries and store them in a cool, dry place. Charge them periodically to prevent sulfation.
Safety Measures
Always exercise caution when working with RV antifreeze, as it is toxic if ingested. Keep it away from pets and children. Additionally, ensure your RV is properly ventilated during the winter to prevent the buildup of harmful fumes.
Conclusion
In conclusion, winterizing your RV trailer is a crucial step to protect your investment and ensure it’s ready for your next adventure. By following this comprehensive step-by-step guide, you can confidently prepare your RV for the winter months, preventing costly damage and repairs.
Remember that proper winterization is an essential part of RV ownership, and it will pay off in the long run with a well-maintained and trouble-free vehicle when spring arrives.
Next, read: Average Trailer Weights by Type


