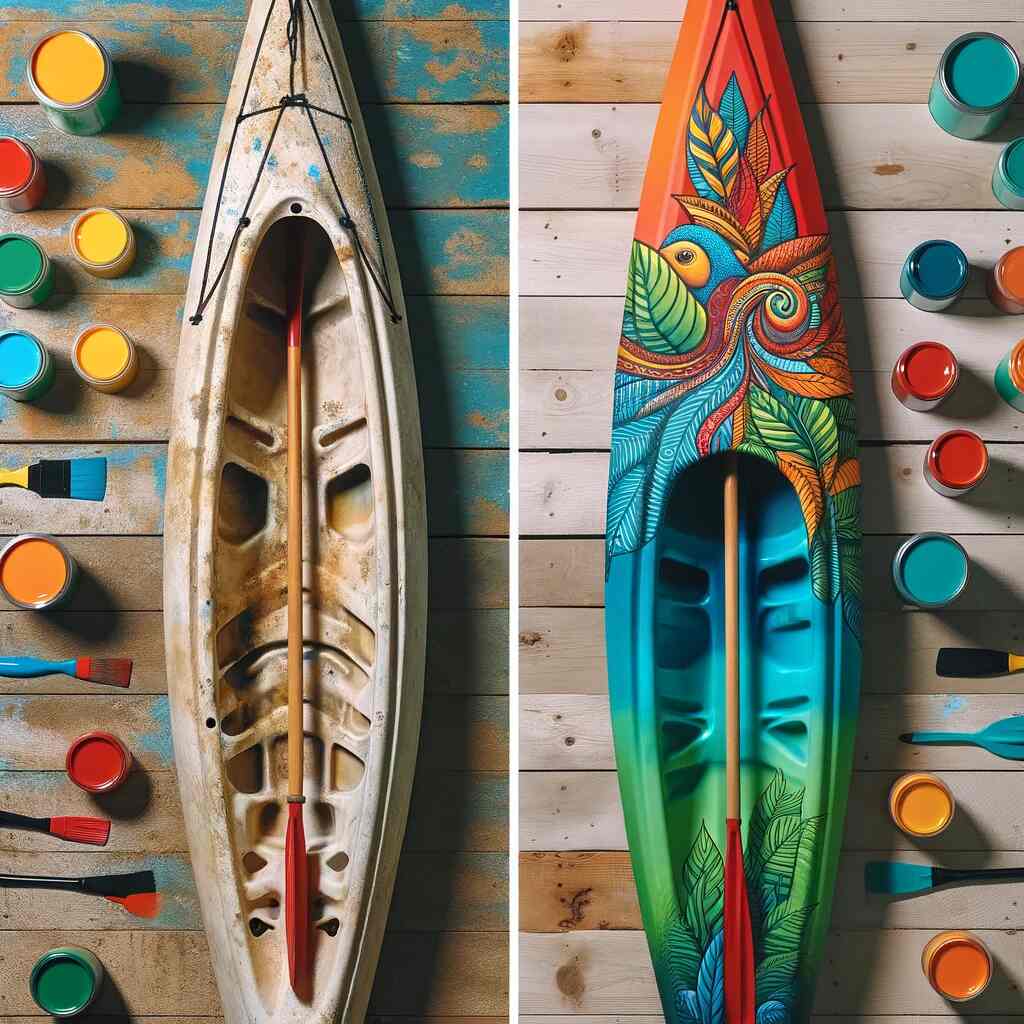
Kayaking is a thrilling outdoor activity that allows you to connect with nature while enjoying the tranquility of the water. Whether you’re a novice paddler or a seasoned kayaker, there may come a time when you want to personalize your kayak to make it stand out or simply give it a fresh new look. Painting your kayak can be a creative and rewarding endeavor, but it’s essential to do it right to ensure the longevity and performance of your vessel. In this comprehensive guide, we’ll walk you through the step-by-step process of painting a kayak, from preparation to finishing touches.
Why Paint Your Kayak?
Before we dive into the nitty-gritty of painting a kayak, let’s consider why you might want to undertake this project in the first place. There are several reasons why painting your kayak can be a great idea:
1. Personalization
Painting your kayak allows you to express your creativity and personalize your vessel. You can choose colors, designs, and patterns that reflect your personality or match your preferences.
2. Identification
A custom paint job can help you quickly identify your kayak in a crowded boat launch area or on the water. This can be particularly useful if you’re kayaking with a group of friends or participating in races.
3. Maintenance
Painting your kayak can also serve as a form of maintenance. A well-applied paint job can protect your kayak’s surface from UV rays, water, and other environmental factors that can cause wear and tear over time.
4. Renewed Appearance
If your kayak has seen better days and is marred with scratches and dings, a fresh coat of paint can give it a new lease on life and make it look like new again.
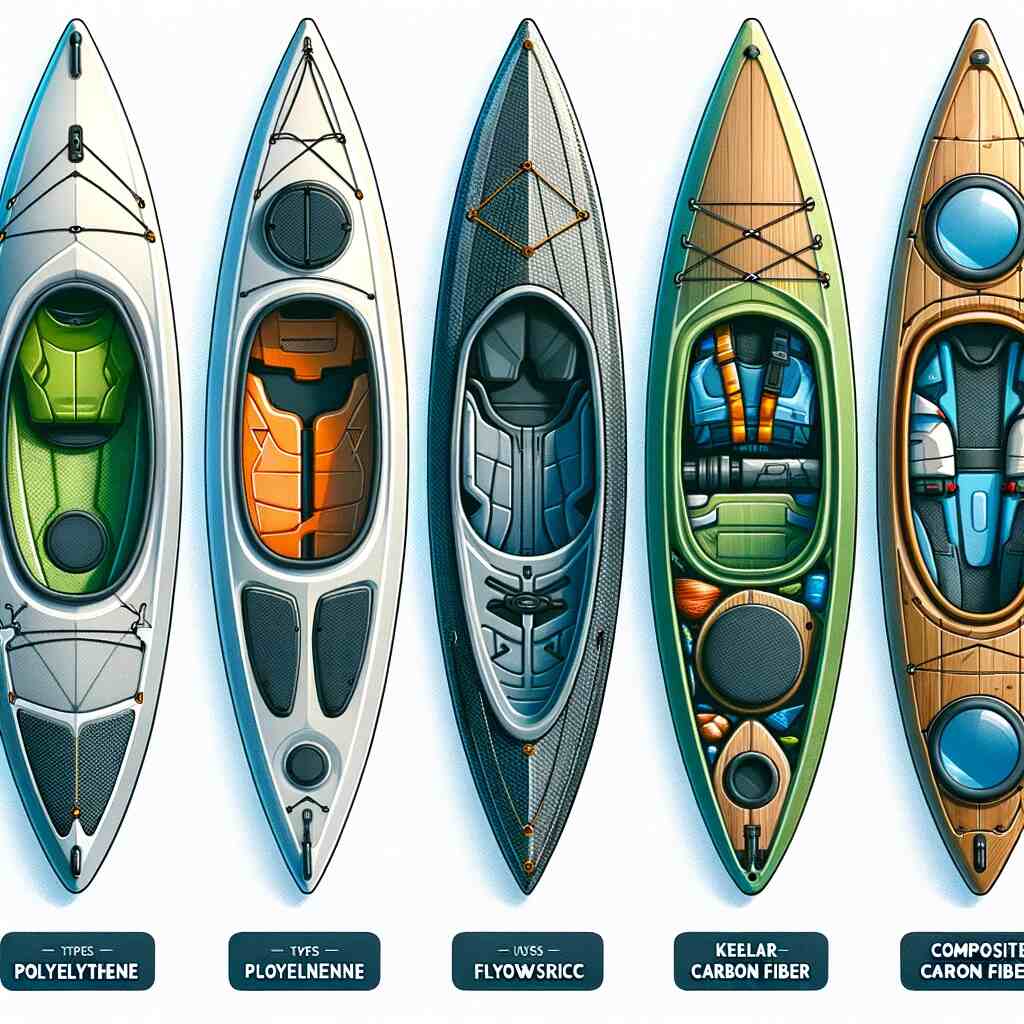
Types of Kayaks
Choosing the right type of paint for your kayak is crucial to ensure a long-lasting and durable finish. The type of paint you select should depend on the material of your kayak and your specific needs. Here, we’ll discuss common kayak materials and the suitable paints for each type.
1. Polyethylene Kayaks:
Polyethylene is a popular material for recreational kayaks due to its affordability and durability. However, it can be a bit challenging to paint due to its low surface energy, which can make paint adhesion difficult. If you have a polyethylene kayak and want to paint it, follow these steps:
Suitable Paints for Polyethylene Kayaks:
- Fusion Paints: Fusion paints are specifically designed for hard-to-paint plastics like polyethylene. They bond chemically with the material, ensuring good adhesion and durability.
2. Fiberglass Kayaks:
Fiberglass kayaks are known for their lightweight and stiff construction, making them a popular choice among experienced kayakers. The fiberglass surfaces are relatively easy to paint, but proper preparation is key to achieving a lasting finish.
Suitable Paints for Fiberglass Kayaks:
- Marine-Grade Polyurethane Paints: These paints are durable and provide a glossy finish. They adhere well to fiberglass surfaces and provide excellent UV resistance.
- Epoxy Paints: Epoxy-based paints are another excellent choice for fiberglass kayaks. They are tough, provide a high-gloss finish, and offer good chemical and UV resistance.
3. Composite Kayaks (Kevlar, Carbon Fiber):
Composite kayaks are high-performance boats known for their strength-to-weight ratio. Kevlar and carbon fiber are common materials used in their construction. Painting composite kayaks is similar to fiberglass, but it’s essential to ensure proper adhesion.
Suitable Paints for Composite Kayaks:
- Marine Epoxy Paints: Marine epoxy paints work well on composite kayaks. They provide a durable finish, excellent adhesion, and resistance to UV rays.
4. Wood Kayaks:
Wooden kayaks offer a traditional and elegant look, but they require special attention when it comes to painting. Proper preparation is crucial to seal the wood and protect it from moisture.
Suitable Paints for Wooden Kayaks:
- Marine Varnish: Marine varnish is an excellent choice for wooden kayaks. It provides a clear, glossy finish that showcases the wood’s natural beauty while protecting it from water and UV damage.
- Marine Paints: For those who want to paint their wooden kayak with color, marine-grade paints designed for wood can be used. Ensure that the paint is suitable for marine environments and provides good adhesion to wood.
Tips for Painting Kayaks
- Surface Preparation: Regardless of your kayak’s material, proper surface preparation is essential. Clean the kayak thoroughly and, if necessary, sand it to create a slightly rough surface for better paint adhesion.
- Primer (for non-polyethylene kayaks): For materials like fiberglass, composite, and wood, using a marine-grade primer can improve paint adhesion and durability.
- Choose the Right Application Method: You can apply paint with brushes, rollers, or even spray guns. The choice of method depends on your skill level and the finish you want to achieve.
- Multiple Coats: Applying multiple thin coats of paint is better than one thick coat. Thin coats dry faster, adhere better, and result in a smoother finish.
- Cure Time: Follow the manufacturer’s instructions regarding drying and curing times. Curing times can vary depending on the type of paint and environmental conditions.
- Safety: Always follow safety precautions when using paints, including wearing gloves, eye protection, and a respirator mask, especially in poorly ventilated areas.
Before starting your kayak painting project, it’s advisable to consult the paint manufacturer’s recommendations and instructions specific to the paint you’ve chosen. Additionally, take your time in the preparation and painting process to ensure a beautiful and durable finish that will enhance both the aesthetics and longevity of your kayak.
With all that out of the way let’s move on to the step-by-step guide to painting your kayak.
Step 1: Gather Your Materials
Before you start painting, it’s crucial to gather all the necessary materials. Here’s a list of what you’ll need:
- Kayak: Ensure your kayak is clean and free of dirt, debris, and any previous paint or coatings.
- Paint: Choose high-quality marine-grade paint designed for kayaks. You can opt for one-part or two-part paints, depending on your preference and skill level.
- Paintbrushes and Rollers: Select brushes and rollers suitable for your chosen paint type. Foam rollers are often a good choice for smooth finishes.
- Painter’s Tape: Use painter’s tape to mask off areas you don’t want to paint, such as hatches and handles.
- Sandpaper: You’ll need sandpaper with different grits (from coarse to fine) to prepare the kayak surface.
- Primer (Optional): If your kayak has a glossy or non-porous surface, consider using a marine-grade primer to help the paint adhere better.
- Cleaner: Use a boat cleaner or a mixture of mild detergent and water to clean the kayak thoroughly before painting.
- Drop Cloths or Tarps: Protect your work area from paint spills and splatters.
- Safety Gear: Wear appropriate safety gear, including gloves and a respirator mask, to protect yourself from paint fumes and chemicals.
Step 2: Choose Your Design
Before you start painting, it’s a good idea to plan your design. Whether you want a solid color, a simple pattern, or a more intricate artwork, having a clear vision will make the process smoother. Consider sketching your design on paper or using digital design tools to visualize the final look of your kayak.
Remember that your design should not only be aesthetically pleasing but also functional. Ensure that any markings, patterns, or colors you choose do not obstruct important information on your kayak, such as safety labels, serial numbers, or registration information.
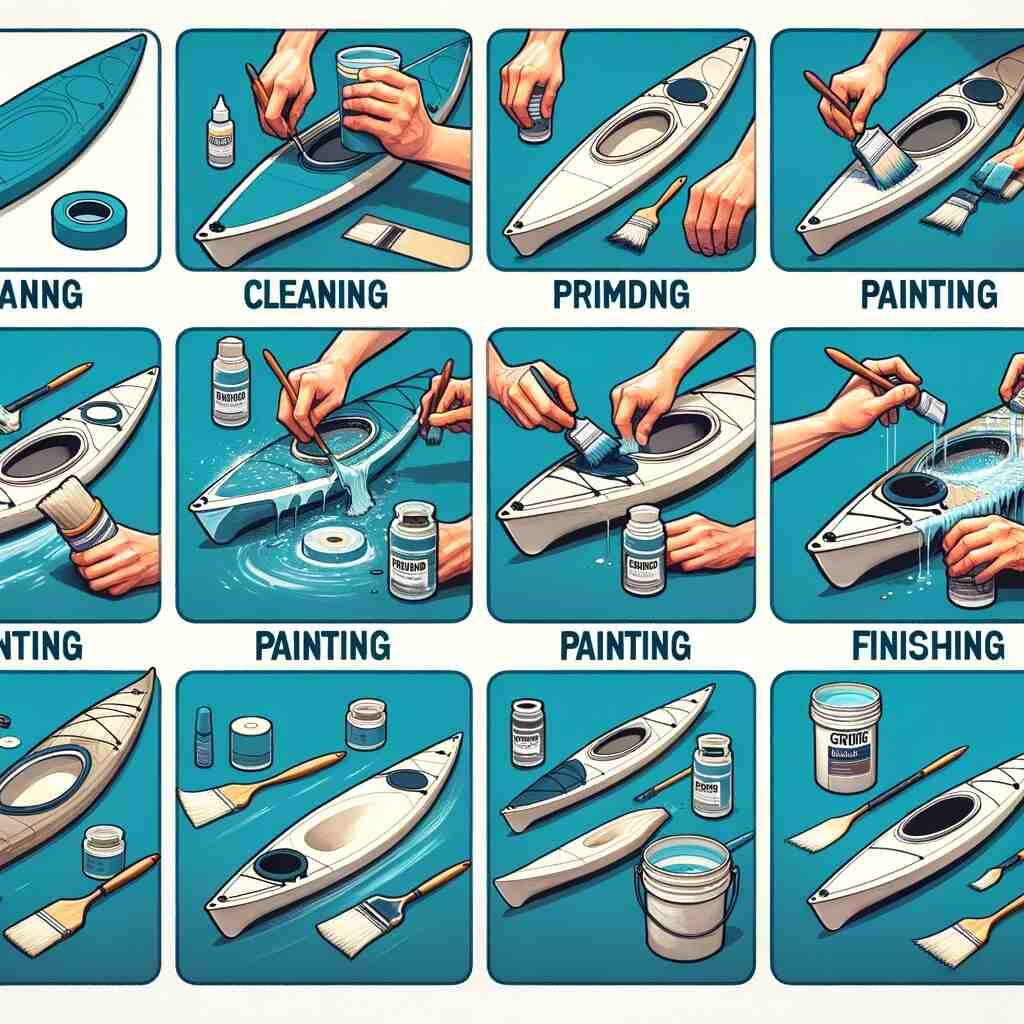
Step 3: Prepare Your Kayak
Proper preparation is crucial to ensure the paint adheres well to your kayak’s surface. Follow these steps to prepare your kayak:
- Clean Thoroughly: Wash your kayak with a boat cleaner or a mixture of mild detergent and water to remove any dirt, grease, or contaminants. Rinse it thoroughly and allow it to dry completely.
- Remove Accessories: Take off any removable accessories like hatches, handles, and straps. If you can’t remove certain parts, use painter’s tape to cover them.
- Sand the Surface: Use sandpaper to roughen the kayak’s surface slightly. This will help the paint adhere better. Start with a coarse-grit sandpaper and progressively move to finer grits until the surface feels smooth to the touch.
- Clean Again: After sanding, clean the kayak once more to remove any dust or debris created during the sanding process.
- Apply Primer (Optional): If your kayak has a glossy or non-porous surface, applying a marine-grade primer can improve paint adhesion. Follow the manufacturer’s instructions for the primer application and drying time.
Step 4: Mask Off Areas
Before you start painting, use painter’s tape to mask off any areas you don’t want to paint. This includes hatches, handles, and any other fixtures or accessories on your kayak. Take your time to ensure that the tape is applied evenly and securely to create clean lines.
Step 5: Start Painting
Now comes the exciting part—painting your kayak. Follow these steps for a smooth painting process:
- Choose Your Paint: Depending on your preference and skill level, you can opt for one-part or two-part marine-grade paint. Two-part paints often provide a more durable finish but require mixing before application.
- Stir the Paint: If you’re using a two-part paint, follow the manufacturer’s instructions for mixing the paint components thoroughly.
- Apply the First Coat: Start with a thin, even coat of paint. Use a paintbrush or foam roller to apply the paint, working in long, smooth strokes. Ensure you cover the entire kayak’s surface evenly. Don’t worry too much about achieving full coverage with the first coat; it’s normal to see some of the original color or primer underneath.
- Let It Dry: Allow the first coat to dry completely according to the paint manufacturer’s recommendations. This may take several hours to overnight, depending on the type of paint and environmental conditions.
- Apply Additional Coats: Apply additional coats of paint as needed. Most kayaks will require at least two to three coats for complete coverage. Between each coat, lightly sand the surface with fine-grit sandpaper to ensure good adhesion and a smooth finish. Clean the kayak to remove any sanding dust before applying the next coat.
- Artistic Touches: If you’re adding artistic details or designs, use fine brushes and take your time to create precise lines and shapes. You can also use stencils or masking tape to achieve specific patterns or effects.
- Allow Final Coat to Cure: After applying the final coat, allow your kayak to cure for the recommended time. This is typically a few days to a week, depending on the paint type.
Step 6: Finishing Touches
Once your kayak has dried and cured, it’s time for the finishing touches to ensure your paint job lasts and looks great:
- Remove Painter’s Tape: Carefully remove the painter’s tape, taking your time to ensure clean lines. If any paint has seeped under the tape, use a small brush and a bit of thinner to clean it up.
- Reattach Accessories: Put back any accessories you removed before painting, such as hatches, handles, and straps.
- Inspect for Imperfections: Inspect the painted surface for any imperfections, such as drips, bubbles, or uneven spots. If you find any, you may need to sand and touch up those areas.
- Apply a Clear Coat (Optional): To enhance the durability and shine of your paint job, consider applying a clear marine-grade polyurethane or varnish. This step is optional but can provide additional protection.
- Maintenance: To keep your kayak’s paint looking great, wash it regularly with freshwater after each use and avoid dragging it on rough surfaces. UV-resistant wax or polish can also help protect the finish from sun damage.
Step 7: Enjoy Your Custom Kayak
With the final touches complete, you can now take your custom-painted kayak out on the water and enjoy the fruits of your labor. Your kayak will not only perform well but also stand out in the crowd, reflecting your unique style and personality.
Frequently Asked Questions about Painting a Kayak
Can I paint my polyethylene kayak?
Yes, you can paint a polyethylene kayak, but the process requires proper surface preparation, such as light sanding and cleaning, as well as using paint specifically designed for plastic surfaces like acrylic paint or plastic spray paint.
Do I need to prime my kayak before painting?
Priming is essential for composite kayaks, as it improves paint adhesion and provides a more even finish. For polyethylene kayaks, using plastic spray paint with a built-in primer or a specialized plastic primer can help with adhesion. Always follow the paint manufacturer’s recommendations.
Can I paint my inflatable kayak?
Yes, you can paint an inflatable kayak, but you need to use paint specifically designed for flexible surfaces, such as flexible vinyl paint or inflatable boat paint. These paints remain flexible after drying, preventing cracking or peeling when the kayak is inflated or deflated.
How long does the paint take to dry and cure?
Paint drying times vary depending on the type of paint and environmental conditions. Acrylic and marine paints typically dry to the touch in 1-2 hours, but you should wait at least 4-6 hours before applying additional coats or handling the kayak. Paint curing times can range from 7-14 days.
How do I protect my paint job?
Protect your paint job by applying a clear coat that provides UV protection and resistance to water and abrasion. After the clear coat has fully cured, you can also apply a marine-grade wax or polish for added protection.
Can I paint over the existing design on my kayak?
Yes, you can paint over the existing design on your kayak. Ensure you clean and lightly sand the surface to improve paint adhesion. If you want to completely cover the existing design, apply a primer before painting to prevent the old design from showing through.
How do I maintain the painted surface of my kayak?
To maintain the appearance and durability of your painted kayak, rinse it with fresh water after each use, especially in saltwater environments. Store your kayak in a cool, dry place away from direct sunlight, and periodically apply a marine-grade wax or polish to protect the paint from scratches and fading.
Conclusion
Yes, you can paint a kayak! Painting a kayak can be a rewarding and creative endeavor that allows you to personalize your vessel and protect it from environmental factors. By following this step-by-step guide, you’ll be well-prepared to tackle the project with confidence.
Remember to gather the necessary materials, prepare your kayak, choose your design, and take your time during the painting process. With proper care and maintenance, your custom-painted kayak will provide you with years of enjoyment on the water, all while turning heads and sparking conversations about your unique, eye-catching design.
So, go ahead and paint your kayak – it’s time to make a splash in style!
Here is an article you might like to read next: Do Kayaks Flip Easily? Mastering Kayak Stability


